Now that we’ve learned how to create an assignment the next step is to learn how to grade submitted assignments if it is not set to auto-grade.
During the assignment creation process you have the option set it up so that it can be auto-graded. If you don’t select the auto-grade option you will need to manually grade the assignment in order for the students to move forward in the course if the assignment is required.
How do I grade the assignment?
The first step in grading any assignment is to go to the Instructor Gradebook and click on the title of the course the student is in.
-
- Click on the student’s name to bring up the course elements.
-
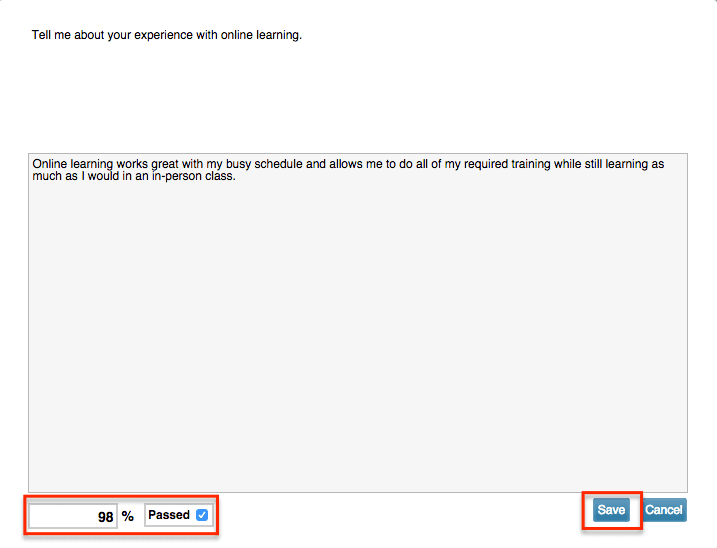
- Look to the right of the assignment element and you will see ‘—’ and ‘waiting to be graded’. Click on ‘—’ and a window will open up that will allow you to read the student’s submission and then grade it.

- Look to the right of the assignment element and you will see ‘—’ and ‘waiting to be graded’. Click on ‘—’ and a window will open up that will allow you to read the student’s submission and then grade it.
-
- Enter in the grade you would like to give the student and then check whether they have passed it or not.

- Enter in the grade you would like to give the student and then check whether they have passed it or not.
- Click the ‘Save’ button and it will officially be graded!
Helpful hint: Keep in mind that if an assignment is set as required the student will not be able to move forward in the course until the assignment has been graded.
