Creating videos for elearning courses is proven to increase student engagement and help learners retain information. According to the University of Queensland, digital video inspires and provides an enhanced learning experience, which in turn, allows a deeper understanding of materials. What you plan on teaching in the video will decide the type of video recording that is best:
- To teach training on software or to give technical advice, screencasting can be used. Screencasting allows your screen to be filmed as you give a tutorial or instructions with the use of audio using a built-in or attached microphone. Test out Screencast-O-Matic, ScreenFlow, or any other recording applications you find that seem to have the features you need.
- For presentations, PowerPoint with voiceover can be used with a screencasting service, as mentioned above. Each slide presents new information or images as you guide the audience through the entire lesson.
- For a fully recorded instructor-led lesson, use a program that already comes on the computer, such as iMovie or Windows Movie Maker. You can gather footage with your webcam or a mobile phone. You don’t need expensive equipment to record!
- To show animation videos (without being a graphic design expert), you can use programs like PowToon or Vyond. Platforms like these already have images within that can be manipulated to move around.
If you are planning to be filmed in front of the camera, before jumping in, there are some basic guidelines you can follow before starting your recording.
- Make sure there are no distractions around you and create a professional-looking area with a neutral background.
- Dress appropriately and remember that students will observe everything that is in-frame.
- Position the camera in front of you or slightly above, at eye level, and not below you. No one wants to see up your nose!
- It also helps if you do not see yourself while recording. This distraction can take your eyes away from what you are doing and looks as if you are not focused on what you are teaching.
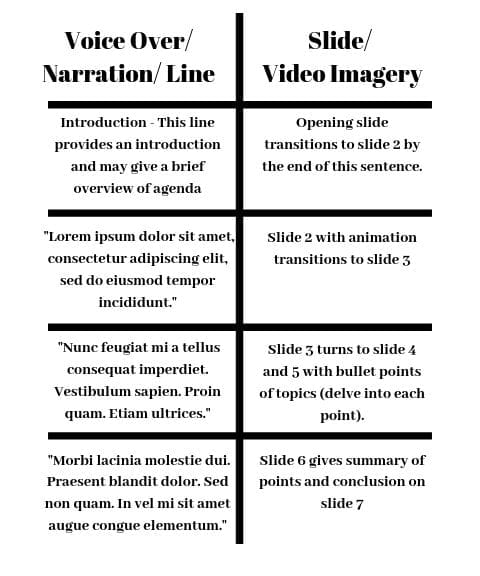
Regardless of the type of video you choose to develop, you should always create a script or storyboard to help the flow of your recording—and editing when you get to that point. With the exception of having real lines and slide names/images, your script should look something like this:

If you are the creative type, feel free to draw on your slides or images along with your lines. Keep your storyboard or script nearby in case you need to refer to it during recording and don’t worry if you have any hiccups; that’s what video editing is for! We will discuss editing in the next blog, but for now you can get started on your content for video.
Now that you’ve created that engaging video, thoughtful editing helps you fine tune your message even more. We’ll provide video editing tips in our next blog. Once you’ve created and edited your video, what’s the best way to make it part of your new course content? Use DigitalChalk’s chalkboard feature to quickly and easily add media content to your online courses. You can upload any video files up to 1GB in size and an hour in length. From microcontent to longer, in-depth training videos, DigitalChalk can support your videos based on your needs. Watch this how-to video to learn how to add a video (or audio) file to a chalkboard:
