Are you working on creating a chalkboard for your online course and not sure how to add media and slides? Don’t worry! Follow this guide and you’ll be a pro at creating chalkboards in no time.
To begin, there is one important thing that you need to take note of. If you just want to add slides to a chalkboard you do need to have a media file uploaded in order to add the slides to the timeline.
Now, let’s go through the steps on how to add media and/or slide files:
- Go to your ‘Manage Courses’ tab.
- Click on the title of the course you would like to add a chalkboard to, then select ‘Manage Course Elements’
- If you’ve already created a chalkboard, click on the element and select ‘edit chalkboard’ – if it has already been activated you will need to select ‘edit the live version’ option.
- Next, you will see ‘Manage Slides’ and ‘Manage Media’ sections, begin by clicking on the ‘Manage Media’ section. This will bring you to a page that will allow you to upload the media file you would like on this chalkboard. Click the ‘+’ button and you will be able to select your media file to upload.

*Remember: if you do not want to use a media file you still need to have one uploaded in order to add slides to the timeline.
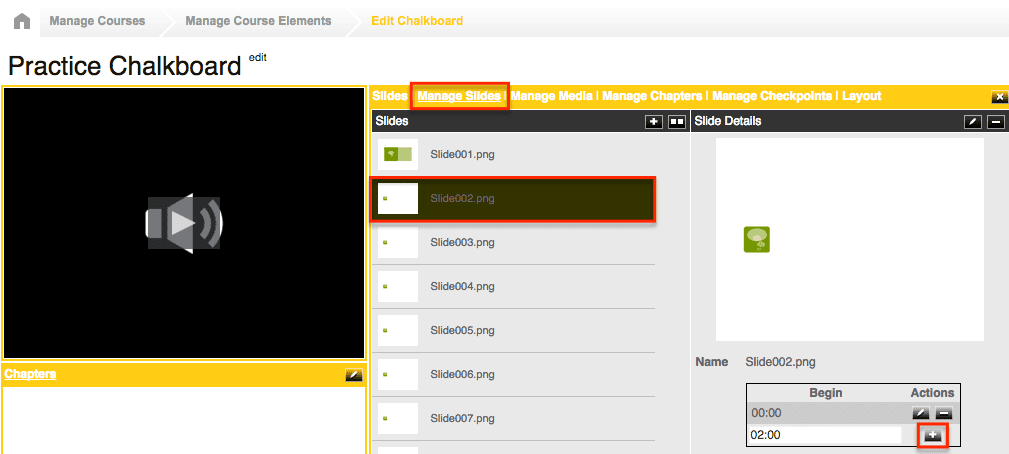
- Once you have uploaded the media file, you are ready to upload your slides – select the ‘Manage Slides’ option and upload your presentation to the chalkboard after selecting the ‘+’ button.
- The last step in this process is to add the slides to the timeline. To do this, you will want to make sure you have selected ‘Manage Slides’ and you see the list of slides. Click on the first slide and to the right you will see a begin and actions box. The first slide will need to start at 0:00, so hit the ‘+’, enter in an end time and hit the ‘+’ button again. You will need to do this for every slide.

