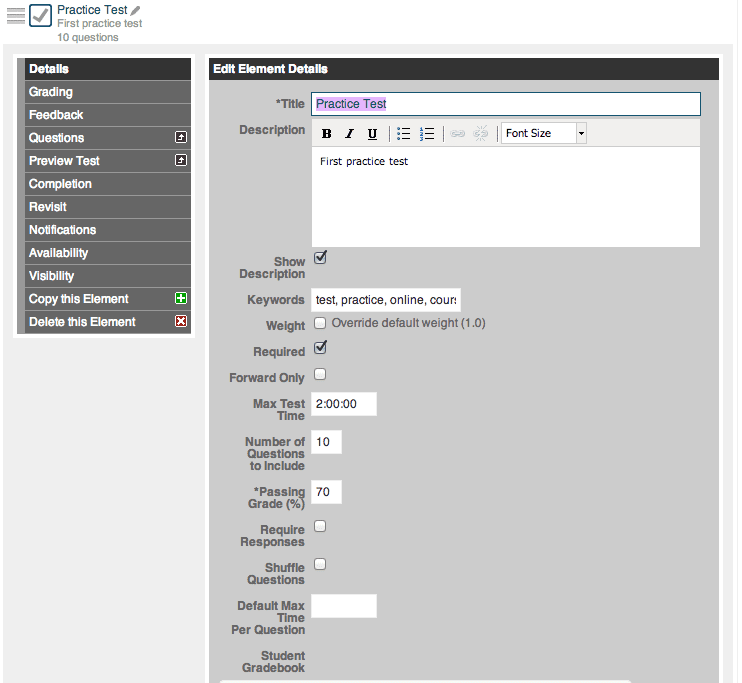
Now that we have gone through the initial creation process of a test element it’s time to get more into the more technical details of the test element set up.
Test settings
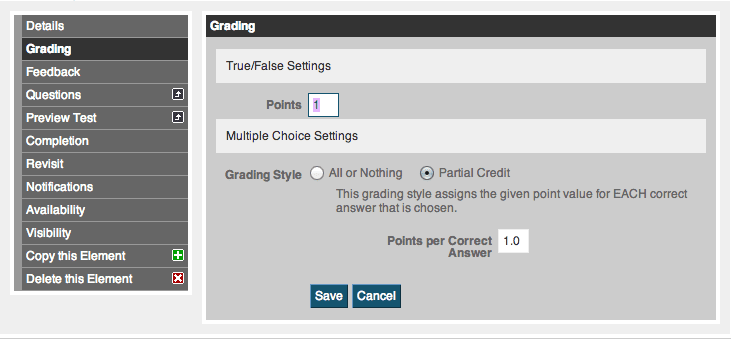
Grading…
Allows you to determine what the point value is for each question. You can choose from the default point value, which is 1.0, or enter in a point value you wish it to be.
If it is a multiple choice question, you are given the option to have the question be ‘All or Nothing’ or ‘Partial Credit’. The ‘Partial Credit’ option is often used when a question has multiple answers, so if a student misses one of the answers they still receive some credit for the partially correct response.
Forward only
Completion…
This gives you the 3 options to choose from that will determine how many times the student can take the test:
- The test is complete as soon as the student finished it, no matter what the grade on the test.
- The student must pass this test. The student will have to retake the test until they receive a passing grade.
- The test is complete when the student passes it or when they have taken it a specified number of times.
Revisit…
This allows you to give the students the ability to review their attempt at the test. You can choose from the following options:
- Until course completion
- For a given number of views
- After some amount of elapsed time
Question settings
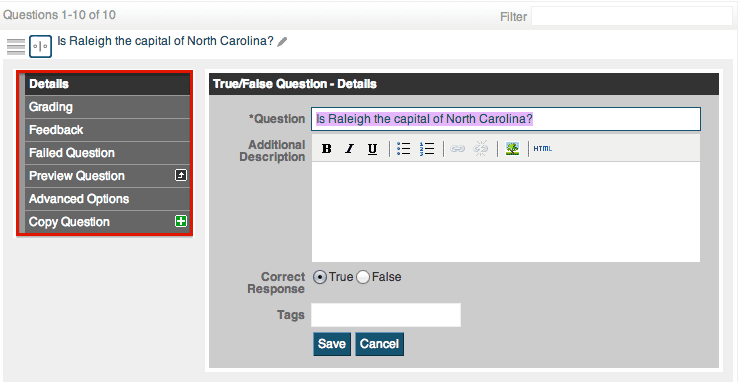
With each question you will have a number of options to choose from so you can have the ultimate control over each and every question that is presented to your students.

Details…
This is the section where you will be able to edit the initial information you filled out when creating the question. This consists of the question itself, the answers, label style, shuffle answers, and allow multiple responses.

Feedback…
This section allows you to give the student a comment for a correct, or incorrect, answer. This is great option that allows you to give students more guidance on why their chosen answer was correct, or incorrect.
Failed Question…
The failed question setting allows you to select a consequence for an incorrect answer, if necessary. You are given the choice to reset the user’s progress on a previous chalkboard element – therefore requiring them to go back and review the chalkboard before continuing on in the course.

Advanced Options…
- Always include in test: If you choose the ‘Shuffle Answers’ under the ‘Details’ section of the test settings you can choose this option so that every students test will always have this question, no matter what.
- Max time: Here you will be able to control how long students will have to spend on the individual question.
- Require response: Students must answer this question to continue on through the test.
